Homemade Slow Cooker Applesauce

This past week has had the coolest weather NYC has seen in a while. The leaves are starting to change and it’s finally time to break out the sweaters, denim jackets and leggings… all the leggings!

img_4471

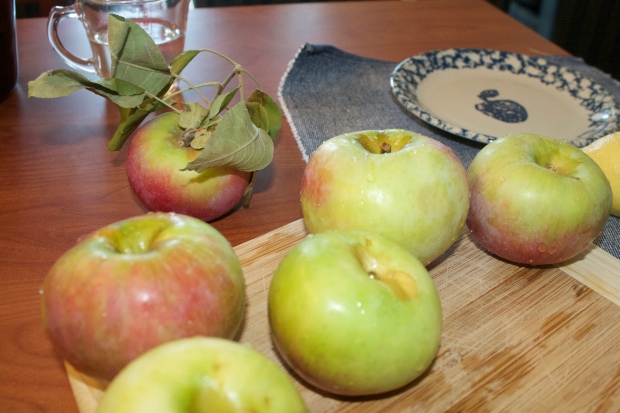
I’ve already seen a shift in my food cravings go from lighter and colder refreshments, to more hearty and warm meals. It’s not surprising that I’ve found a healthy way to satisfy these cravings with some leftover apples that I picked a few weeks ago upstate!

img_4480

This delicious homemade slow cooker applesauce is the perfect snack, side dish and even dessert. It uses only the freshest and minimal ingredients, but yields a creation so good that you’ll have to stop yourself from eating it all in one sitting.

img_4515

classy-cookbook-logo

Homemade Slow Cooker Applesauce

Prep Time: 15 Minutes     Cook Time: 4 hours     Total Time: 4 hours 15 Minutes

img_4475

Let’s Get Started:

6 large apples (any kind!), cored and peeled
2 cinnamon sticks (or 2 Tbsp of ground cinnamon)
1 Tbsp lemon juice
1/2 cup water
1/4 tsp salt

Let’s Get Cooking:

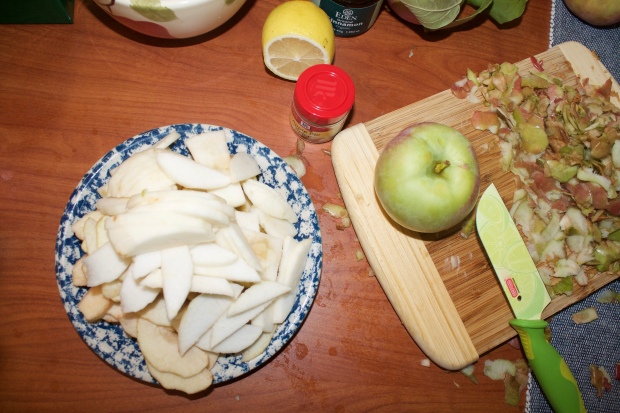
Peel, core and chop apples into 1-2 inch pieces. Combine all ingredients in slow cooker and close the lid. Cook the applesauce on high for 4 hours, stirring occasionally. Cool and store – it will stay up to 5 days in the refrigerator or freeze up to 3 months.

Let’s Get Creative:

This recipe makes the applesauce slightly chunky (which I prefer)! But if you’re into a more smooth texture applesauce, after it’s done cooking let it cool and then put it into a blender or food processor to get your desired texture.

Stay Classy & Enjoy! xx

Golden & Delicious Apple Pie

There are so many reasons why fall is such a great season (yes, half of them are food). In addition to sweater weather and gorgeous walks in red and orange transformed parks, fall spices up your menu with some of your favorite seasonal fruits and veggies.

img_4472

One of my favorite weekend activities in the fall is apple picking, and I’ve already gone once this season so far! This may or may not have something to do with my favorite fall dessert… But if you are thinking of taking a trip down to a nearby apple orchard this season, plan to go soon – the apple crop was pretty low this year and you don’t want to miss out!

img_4488

Anyway, the recipe below is FLAWLESS and the pie came out so delicious that I just had to share. It’s never too early to start celebrating the changing of the seasons and CATC will be enjoying the benefits all week with an apple recipe series – sorry bananas, but we’ve moved on! x

img_4482

img_4485

img_4492

Note: This pie tastes incredible room temp. or warmed, or with a scoop of delicious San Bernardo ice cream (I ate it with Italian Cheesecake flavor and let’s just say between two people, the entire pint disappeared so quickly… YUM).

img_4499

img_4510

classy-cookbook-logo

Golden & Delicious Apple Pie

Prep Time: 25 Minutes     Cook Time: 45 Minutes     Total Time: 1 Hour 10 Minutes

Let’s Get Started:

6 cups thinly sliced apples, about 6 medium apples
3/4 cup sugar
1 1/2 tsp Apple Pie Spice (Nutmeg, Cinnamon, All-Spice)
1 Tbsp lemon juice (I used juice from a Limoneira Lemon, and the fresh taste is so different from grocery store quality!)
2 Pillsbury pie crusts (I’m all for making as much of a recipe from scratch as possible, but time restrains kept me from doing so this time… plus this crust is delicious!)

Let’s Get Cooking:

Preheat oven to 425*. Place 1 pie crust in an un-greased 9-inch pie plate, pressing firmly against sides and bottom. In a large bowl, mix filling ingredients and spoon into crust. Top with second crust. Cut a few slits in top of crust before baking.Bake 40-45 minutes, or until crust turns golden brown. Cover edge of crust with tin foil for the first 15 minutes of baking, so that it doesn’t burn! Let cool for 2 hours before serving. Enjoy! 🙂

Let’s Get Creative:

I prefer a more traditional apple pie, but you could of course add more ingredients to the filling (maybe some nuts?) and get more creative with your toppings. San Bernardo offers so many amazing ice cream flavors, my other favorites Cannoli and Italian Biscotti could be delicious pie toppers as well. 😉

Stay Classy! xx

Chicken Tikka Masala with Coconut Rice and Kontos Naan

Being away from London for a few weeks has already made me nostalgic for the city and its food. I stumbled across a can of Tikka Masala sauce while in the grocery store the other day and decided that paired with Kontos Naan, it would be the closest thing to what I learned to make in London that I could get! The flavor is unfortunately not the same as Brick Lane or my favorite Indian pub, but it was delicious and did remind me of my semester abroad.

You can find pre-made tikka masala sauce in most International Foods sections of the grocery store. Kontos Naan is actually hand-stretched so that it is extra fluffy and it was amazing. You can find it here.

13516261_760016977368093_3906782257764843556_n

Let’s Get Started:

For the chicken:

3 large chicken breasts, cut into cubes
1 jar chicken tikka masala sauce
1 teaspoon salt
1 teaspoon pepper
Plain non-fat yogurt

For the rice:

1 can coconut milk
¼ cup water
1/3 cup white basmati rice

Let’s Get Cookin’:

Cut chicken breasts into cubes and season with salt and pepper. In a medium pot, boil water and coconut milk. When it begins to boil, add rice and stir occasionally for 30 minutes. Place chicken pieces into a pan and cook on medium heat for 5 minutes. Add full jar of tikka masala sauce to chicken and let simmer for 20-25 minutes. Make sure chicken is fully cooked. Take off heat and serve with coconut rice, Naan and yogurt.

Let’s Get Creative:

This recipe can also be made vegetarian – Tofu Tikka Masala! Just follow the instructions above and substitute tofu for chicken. I made this for my youngest sister who is a vegetarian and she loved it.

Get creative with your sides! Coconut string beans would go great with this too. Yum!

Enjoy & Stay Classy! xx

Dark Chocolate Dipped Orange Wedges

Orange ya glad it’s summer? Finally! Today marks the second official day of the hottest, happiest and most relaxed season. I’ve been focusing eating a balanced diet – meaning sometimes it’s good to make yourself a cheat treat! – and have been creating some super easy recipes that curb my sweet tooth cravings without the calories.

These adorable orange wedges dipped in 85% baking cocoa and sprinkled with an assortment of shaved coconut, sea salt and almonds are so quick and easy to make. They’re the perfect on-the-go snack and so much more revitalizing than my typical go-to granola bars. These aren’t the pastries we have all been craving, but they are definitely a step in the right direction:)

{Prep Time: 5 Minutes    Cook Time: 10 Minutes    Total Time: 15 Minutes   Serves Approx. 8}

dcdow

Let’s Get Started: 

4 oranges, peeled and separated
1 bar of 85% cocoa baking chocolate
A handful of sliced almonds
A handful of shredded coconut
A handful of sea salt

Let’s Get Cookin’:

Place a piece of parchment paper on a baking sheet. Peel and separate oranges and place spaciously throughout the baking sheet. Break off 1/3 of chocolate bar and microwave for about 1 minute. Stir and reheat if necessary. Dip orange wedge tips into the chocolate and place back on baking sheet. Sprinkle with almonds, coconut and sea salt. Refrigerate for about 10 minutes until chocolate is hardened.

Let’s Get Creative:

Almonds, coconut and sea salt were just ingredients that I happened to have laying around that I think taste delicious with orange wedges! Of course, you can swap these for other ingredients such as raisins, cranberries and other small sweet and salty treats! Personally though, I’m a bit biased to the yummy aftertaste you get from the shredded coconut… mmm:)

Enjoy & Stay Classy! xx

Cinnamon Sugar Crackle Cookies

13083325_736499233053201_9003787120859049347_n

It seems to be a proven fact that whenever I get stressed I quickly gravitate to the kitchen. Making something cute and delicious out of just a few ingredients is a sort of catharsis for me and it gets me out of reality for a while. Not to mention, munching on the delicious yield is something that I totally look forward to! I am currently in the process of cleaning out the last of my kitchen ingredients as my time in London comes to a close and I head off to Italy next week. Cue these cookies as well as rice pudding and crepes that I’ve scheduled time to make these next few days 😉

These cookies are the perfect snackable treat. They’re small yet delicious and full of powerfully yummy cinnamon sugar. Again, my flat has come equipped with barely any kitchen appliances (so I creamed and mixed all of this by hand!) but by all means, if you have access to the wonderful invention that is a mixer, I urge you to take advantage of it!

13087605_736499266386531_2183051996824389408_n

Let’s Get Started:

1 cup sugar
½ cup butter
1 large egg
1 teaspoon vanilla
1 ½ cups flour
1 ½ teaspoons cinnamon
1 teaspoon baking powder
¼ teaspoon salt
cinnamon sugar

Let’s Get Cookin’:

In a medium sized bowl, cream together sugar and butter; beat in egg and vanilla. Combine flour, cinnamon, baking powder and salt. Add to butter mixture. Blend well. Cover and refrigerate for 2 hours or until firm enough to roll into little balls (took the full 2 hours for me!). Shape dough into small balls, about ¾ inch in diameter. Roll in cinnamon sugar. Place cookies 1 inch apart on lightly greased cookie sheets or parchment paper. Bake at 350* for 10 minutes or until the edges are lightly browned. Cool on pans and then remove. Enjoy!

Let’s Get Creative:

Yum! These cookies are simply perfect on their own, but there are definitely ways to spice them up a bit more. One idea is to add some crushed nuts to the dough. You could also add some raisons, thinly sliced, to make a cinnamon raison cookie dough mix. Raid your kitchen cabinets and see what ingredients you have lying around, these cookies are the perfect base with which to get creative!

Enjoy & Stay Classy! xx

Coconut Carrot Soup

12803276_714649245238200_7086278880483033047_n

Ever since getting my workout schedule in order I’ve been more inclined to make healthier eating choices. Of course, whenever I am traveling I make sure to spoil myself and order the dishes that look incredible and are a part of the city’s culture, but otherwise I try my best to stay in and cook for myself when I am in London.

Eating healthier has definitely had a huge impact on other aspects of my life. Cutting out most processed foods and sugars enables me to focus better on my work while simultaneously giving me more energy for my workouts and exploring the city. Making these healthy choices also encourages me to drink less alcohol – because if I am not eating my calories, I most certainly don’t want to drink them! The BBG Community has given me tons of meal inspiration and I love trying my own takes on their recipes.

This soup was the first that I’ve made totally from scratch and I was pretty proud of how it turned out! I adapted the recipe from “The Juice Goddess” Dr. Etti’s book Sexi Juicing, and added my own modifications because, unfortunately, I do not have a blender here! I’m excited to bring this book back to NYC with me so I can try some of her awesome juice cleanse recipes though!

Especially if you enjoy the flavors of coconut and carrots (yes, they do go together!), you will fall in love with this soup!

12814718_714649201904871_681144624865280712_n

Let’s Get Started:

2 Tablespoons olive oil or extra virgin coconut oil
1 Onion chopped
2 Pounds of carrots, peeled and chopped into ½ inch chunks
14 ounce can of coconut milk
½ Teaspoon of Himalayan salt
½ Cup of water or enough to cover all ingredients
1 Lemon or lime

Let’s Get Cookin’:

In a large to medium soup pan over medium-high heat add the olive or coconut oil and onions. Stir until the onions are well-coated and allow to sauté until translucent for a few minutes. Stir in the carrots. Allow to cook another minute or two and then add the coconut milk, salt and water. Allow to simmer until the carrots are tender, 10 to 15 minutes, then puree using a blender until the soup is completely smooth. (I skipped this step because I didn’t have a blender and it was still delicious! I’m sure it would be thicker and a beautiful vibrant orange color if blended, though…)

Let’s Get Creative:

Squeeze the lemon or lime juice over the finished soup. Top with crunchy toasted almonds and kale. I added a few mozzarella and basil tortellini to my soup and they tasted fantastic!

Stay Classy & Enjoy! xx

Baked Mediterranean & Parmesan Potato Wedges


12642880_700266120009846_6448914730395299726_n

I know I’m way behind on my posts… but this is for a good reason! Ever since moving to London my down time has been close to none, and that isn’t a bad thing. I’ve been doing so much exploring and cooking that I’ve had little time to write up some posts that do each day justice.

That being said, upon making these delicious potato wedges tonight (which pair delightfully with lamb burgers… lamb is incredibly popular here!) I know that your week will become 100x better when you see how easy this recipe is — definitely try this at home! (Also- it’s going to be an awesome appetizer for the Superbowl this weekend!)


940944_700266183343173_276726384399002585_n

SERVES (2-3)     PREP: 15 Minutes     COOK: 30 Minutes   TOTAL TIME: 45 Minutes

Let’s Get Started: 

3 large russet potatoes, sliced into wedges

4 tablespoons olive oil

1-teaspoon salt

4 teaspoons Mediterranean Spice mix (Garlic, Basil, Parsley, Salt, Pepper, Oregano)

½ cup shredded Parmesan cheese


12645183_700266220009836_4561208631924775591_n

Let’s Get Cooking:

  1. Preheat the oven to 350*F (180*C). Lightly grease a large baking sheet, set aside.
  2. Place potato wedges in a large bowl. Drizzle olive oil over them and mix evenly. In a small bowl mix together spices. Sprinkle potato wedges with Parmesan cheese and mix evenly, then sprinkle spices the same way.
  3. Place potato wedges on prepared baking sheet with skin-sides down. Bake for 25-30 minutes until potatoes are fork tender and golden. Sprinkle with additional cheese, if desired. Enjoy!

Stay Classy! xx

Ginger Chicken Stir-Fry Romaine Wraps with Citrus Soy

ginger chicken

Recipe and photo courtesy of P.F. Chang’s China Bistro.

Let’s Get Ready:

1 pound chicken
3 tablespoons fresh ginger, minced
1 tablespoon garlic, minced
½ teaspoon dry chili flakes
3 tablespoons soy bean oil or vegetable oil
2 heads romaine lettuce, cleaned
½ cup fresh orange juice
1 tablespoon fresh lemon juice
1 tablespoon fresh lime juice
¼ cup soy sauce
1 tablespoon hoisin sauce
1 ounce scallions, sliced thin
2 tablespoons soy sauce

Let’s Get Cookin’:

Dice the chicken into tiny pieces. Place the chicken in a mixing bowl and add 2 tablespoons soy bean oil, garlic, chili flakes and 2 tablespoons soy sauce. Mix together in a circular motion until well mixed. Let marinate in refrigerator for 2-4 hours.

Mix together the citrus juices, soy, and hoisin sauce with a whisk. Reserve until needed. Clean the romaine lettuce, chopping off the stem, peeling each “spear” and running under clean cold water. Reserve in refrigerator until ready to use. Chop scallions into rings and reserve chilled.

Coat a very hot sauté pan lightly with soybean oil. Lay the chicken around the sauté pan being careful not to lay too many on top of each other. Sear the chicken until crispy and golden brown, about 2 ½ minutes. Once chicken is brown, toss gently in pan and sear another 2 ½ minutes. The pan will appear to “burn,” but that is the carmelization and where all the flavor comes from.

Add ½ of the citrus soy mixture to the sauté pan and coat well. Let the sauce coat the chicken until it is glazed, and thickens on the chicken. Add more or less depending on how “wet” you want your mixture. Spoon chicken onto a plate.

Wrap the chicken mixture in romaine lettuce and top with scallion rings. Serve and enjoy!

Let’s Get Creative:

This recipe will be just as delicious with baby shrimp, fish or beef!